BlueStacks and Charles Proxy: A Better Love Story
Recently, I came across a problem: my trusty rooted Android 4 phone couldn't install an app whose API I wanted to reverse engineer, because the app was targeting Android versions 7 and above. Instead of buying a newer phone for my needs, I started looking towards emulators.
The first article I came across was from Mark Dappollone on Medium, but it was published back in 2017 and didn't address my main concern: installing Android Studio just to use its emulator is a massive waste of time and hard drive space. Android Studio is completely unintuitive, and the emulator does not work on my machine at all.
Not only that, but it's meant for developers who can add their own SSL certificates into apps, which is impractical for reverse engineering, when we usually don't have access to the source code. Instead, I turned to an emulator I had used before, BlueStacks. This article will teach you how to root the BlueStacks emulator and use it to proxy calls.
Step 1 - Installation
Of course, you will need to install Charles first. For the emulator, I recommend downloading the latest 64-bit version of BlueStacks 5, since it supports Hyper-V. Once downloaded and installed, launch the application once and let the emulator fully load.
Once loaded, close the emulator and download the latest version of BlueStacks Tweaker. This nifty program will allow us to root the emulator, as well as install Xposed. The latest beta works with the latest version of BlueStacks 5 (5.9).
Step 2 - Root + Xposed
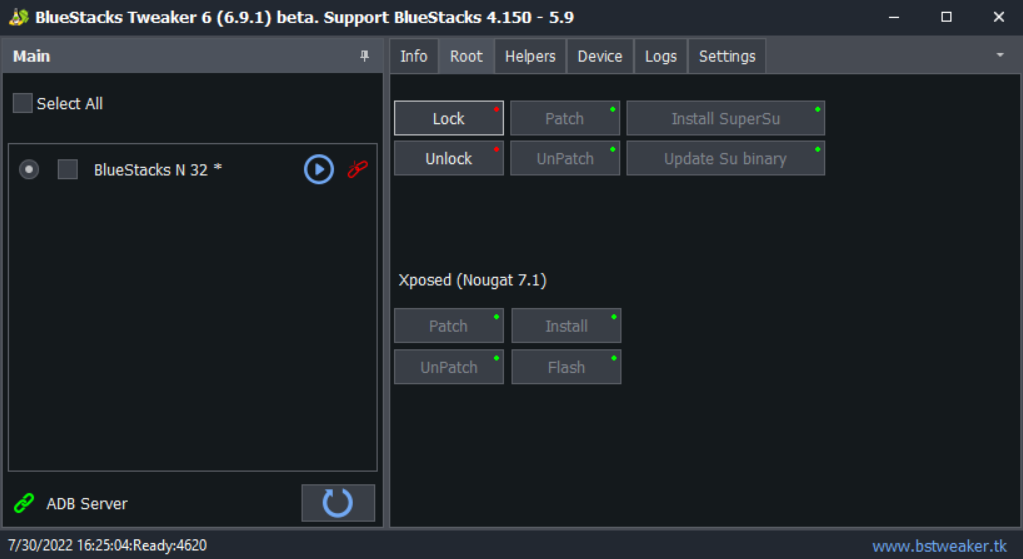
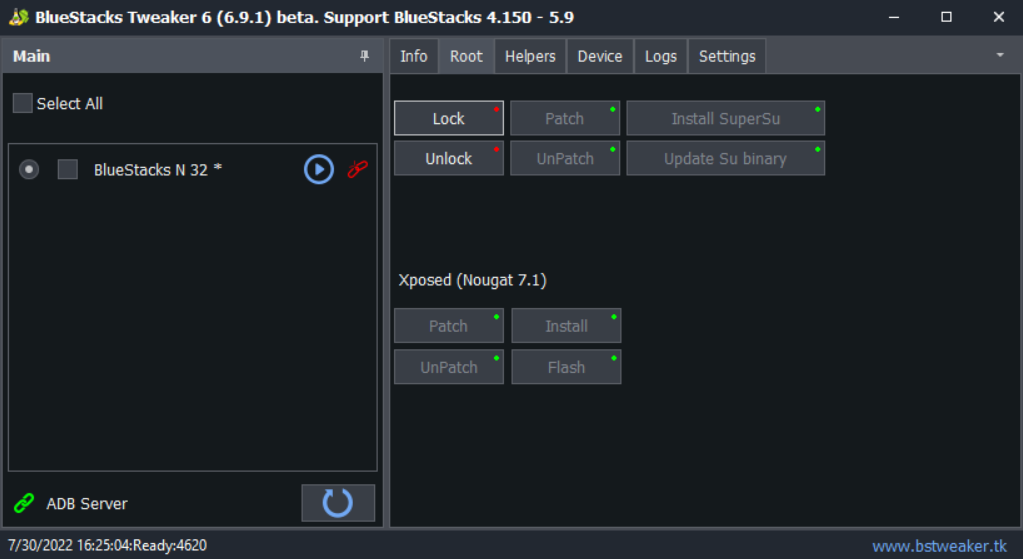
Open BlueStacks Tweaker and navigate to the "Root" tab. Make sure the emulator is closed and press "Unlock". This will unlock the emulator for rooting. Once that is done, press the "Play" button next to your emulator and wait for the emulator to load. Make sure you have Android Nougat (7.1), because BlueStacks Tweaker doesn't support the Android Pie beta yet.

Once the emulator has loaded, press "Patch", then "Install SuperSu", then "Update Su binary". This will close the instance, so don't be surprised. Launch it again, and under the Xposed tab, press "Patch", "Install", and then "Flash". Restart the instance, and then open Xposed. It should say "Xposed Framework version 89 is active." and display a green checkmark. This means we can move onto step 3.
Step 3 - Root Certificate + Proxy
Now that our "device" is rooted and Xposed, we can start by setting the proxy. Kudos to u/ProgramTechie on Reddit for figuring out the steps.
You will need an app like X-plore to edit the Android system files in order to add our proxy and Charles root certificate. Once you've downloaded and installed the app (you can drag the .apk file directly into the emulator), press the three dots in the top right corner and press "Configuration". You'll need to set the app into "Superuser + mount writable" mode.
Briefly head into Charles to set up your proxy. Be sure to turn off the default "Windows proxy" switch in the Proxy tab. Then press Proxy -> Proxy Settings... click both of the switches under the HTTP proxy. After that, press Help -> Local IP Address and take a note of your IP.
Then navigate to /data/system/users/0 (this will prompt the app to allow superuser access. Press "Accept".) and open "settings_global.xml" with the app's file editor. Then add these entries anywhere into the file, making sure to change the IP address to the one given to you by Charles:
<setting id="100" name="global_proxy_pac_url" value="" package="android" /><setting id="97" name="global_http_proxy_host" value="192.168.1.10" package="android" /><setting id="98" name="global_http_proxy_port" value="8888" package="android" /><setting id="99" name="global_http_proxy_exclusion_list" value="" package="android" /><setting id="96" name="http_proxy" value="192.168.1.10:8888" package="com.android.shell" />
Once that is done, save the file and reboot the emulator. You should start seeing HTTP(S) queries in the list, but you will not be able to see HTTPS requests yet. Turn on the SSL proxy by pressing Proxy -> SSL Proxying Settings, pressing the "Enable SSL Proxying" button and adding "*" as a location.
Now we need to install Charles' root certificate into the emulator. To do this, save Charles' root certificate locally by pressing Help -> SSL Proxying -> Save Charles Root Certificate..., and then save the file somewhere locally.
Next, you will need to add it manually into Android's certificate store. Install OpenSSL locally and navigate to wherever you saved the certificate. Then, type these two commands, courtesy of this StackOverflow answer:
openssl x509 -inform PEM -subject_hash_old -in cert.pem | head -1
Next, make a new text file with the name that OpenSSL gives you, with the extension .0. For example: 4a613d6b.0
After that, run this command:
openssl x509 -inform PEM -text -in cert.pem
And copy-paste the text into the text file we just created. Drag and drop this file into the emulator, and open X-plore again. You should find that file in /storage/emulated/0/Download. Copy that file to clipboard and paste it in /system/etc/security/cacerts.
Once that is done, download and install this Xposed module, go to the Xposed Installer -> Modules and enable it. This disables SSL verification and pinning for most apps, making them trust Charles' root SSL certificate, allowing us to sniff the traffic.
Reboot the device, and voila! You now can sniff almost any apps' encrypted SSL traffic.